 Hardwood flooring is a beautiful and durable choice for any home or commercial space, but it requires careful attention to moisture levels and relative humidity to maintain its integrity. Because wood is a hygroscopic material, it constantly interacts with its environment by absorbing and releasing moisture. Understanding this natural process is key to preventing gapping, cupping, buckling, and other flooring failures caused by excessive moisture or extreme dryness.
Whether you’re installing new hardwood floors or maintaining existing ones, keeping moisture levels in check is essential to ensuring long-term performance and aesthetic appeal. Let’s take a closer look at how moisture affects hardwood flooring and what steps you can take to prevent costly damage.
Why Does Moisture Affect Hardwood Flooring?
Wood is a porous, natural material, meaning it expands when it absorbs moisture and contracts when it dries out. This movement is completely normal, but excessive fluctuations in moisture levels can lead to serious flooring problems.
The key factor in wood’s reaction to moisture is its moisture content (MC), which is measured as a percentage of the wood’s weight. The ideal MC for hardwood flooring typically falls between 6-9%, depending on geographic location and climate. However, this balance is influenced by the relative humidity (RH) in the surrounding environment.
- High relative humidity (above 50%) causes wood to absorb moisture from the air, leading to swelling, cupping, and potential warping.
- Low relative humidity (below 30%) causes wood to lose moisture, leading to shrinkage, gapping, and cracks.
For this reason, it’s crucial to maintain consistent humidity levels indoors to minimize excessive movement and maintain the stability of your hardwood floors.
Common Moisture-Related Flooring Issues
When moisture levels fluctuate outside the acceptable range, hardwood flooring can develop noticeable defects. Below are some of the most common moisture-related issues and their causes:
1. Gapping
- What It Is: Gaps or spaces appear between hardwood planks.
- Cause: Wood has dried out and contracted due to low indoor humidity.
- Prevention: Maintain consistent relative humidity (30-50%), especially during winter when indoor heating can dry out the air.
2. Cupping
- What It Is: The edges of the boards rise higher than the center, creating a concave shape.
- Cause: Excess moisture absorption, often from high humidity, leaks, or moisture seeping up from the subfloor.
- Prevention: Ensure proper subfloor moisture control, use a moisture barrier, and regulate indoor humidity levels.
3. Crowning
- What It Is: The center of the plank rises higher than the edges, creating a convex shape.
- Cause: Often occurs when cupped flooring is sanded down before moisture levels return to normal.
- Prevention: Allow flooring to fully stabilize before sanding, and address the underlying moisture issue first.
4. Buckling
- What It Is: The floorboards lift completely off the subfloor, sometimes detaching from adhesives or nails.
- Cause: Extreme moisture exposure, flooding, or improper acclimation before installation.
- Prevention: Address moisture sources immediately, ensure proper acclimation before installation, and install flooring with appropriate expansion gaps.
How to Maintain Proper Moisture Balance in Hardwood Flooring
Keeping moisture and humidity under control is essential for protecting your hardwood flooring. Here are some best practices to prevent moisture-related damage:
Before Installation
- Acclimate the Flooring Properly – Store the flooring inside the installation space for at least 5-7 days before installation, allowing it to adjust to the indoor climate.
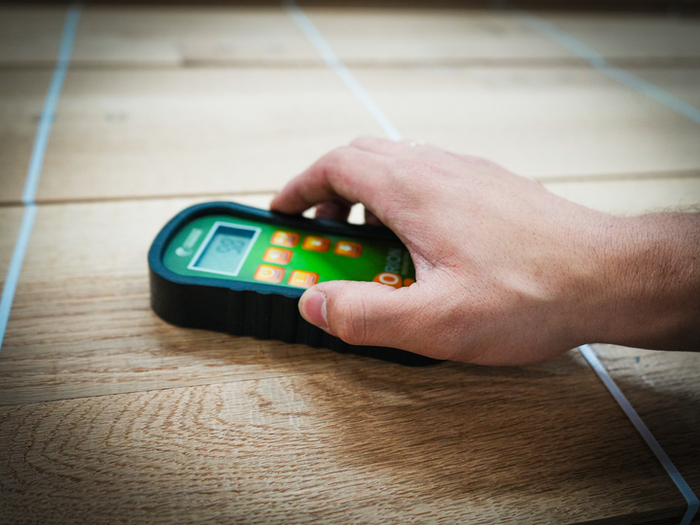
- Check Subfloor Moisture – Use a moisture meter to ensure the subfloor has a moisture content within 2% of the hardwood flooring for plywood subfloors (or within 4% for concrete).
- Use a Vapor Barrier – For installations over concrete slabs or crawl spaces, use a moisture barrier to prevent excess moisture from seeping into the wood.
During Installation
- Maintain Consistent Humidity Levels – Keep relative humidity between 30-50% to minimize excessive wood movement.
- Allow for Expansion Gaps – Leave ¼” to ½” expansion gaps around walls and fixed objects to accommodate natural expansion.
Post-Installation & Long-Term Maintenance
- Use a Humidifier in Dry Months – Winter heating systems can dry out the air, causing shrinkage. Using a humidifier can help maintain a stable indoor climate.
- Run a Dehumidifier in Humid Seasons – High summer humidity can cause excessive swelling. A dehumidifier or proper HVAC system can keep humidity in check.
- Clean Up Spills Immediately – Excessive water can penetrate hardwood flooring, leading to irreversible damage. Wipe up spills promptly to prevent absorption.
Final Thoughts: Protecting Your Hardwood Investment
Hardwood flooring is an investment that enhances the beauty, value, and comfort of any space. However, without proper moisture control, even the highest-quality wood floors can develop costly issues over time.
By following best practices—proper acclimation, controlled indoor humidity, and routine moisture monitoring—you can help ensure that your hardwood floors remain stable, durable, and beautiful for years to come.